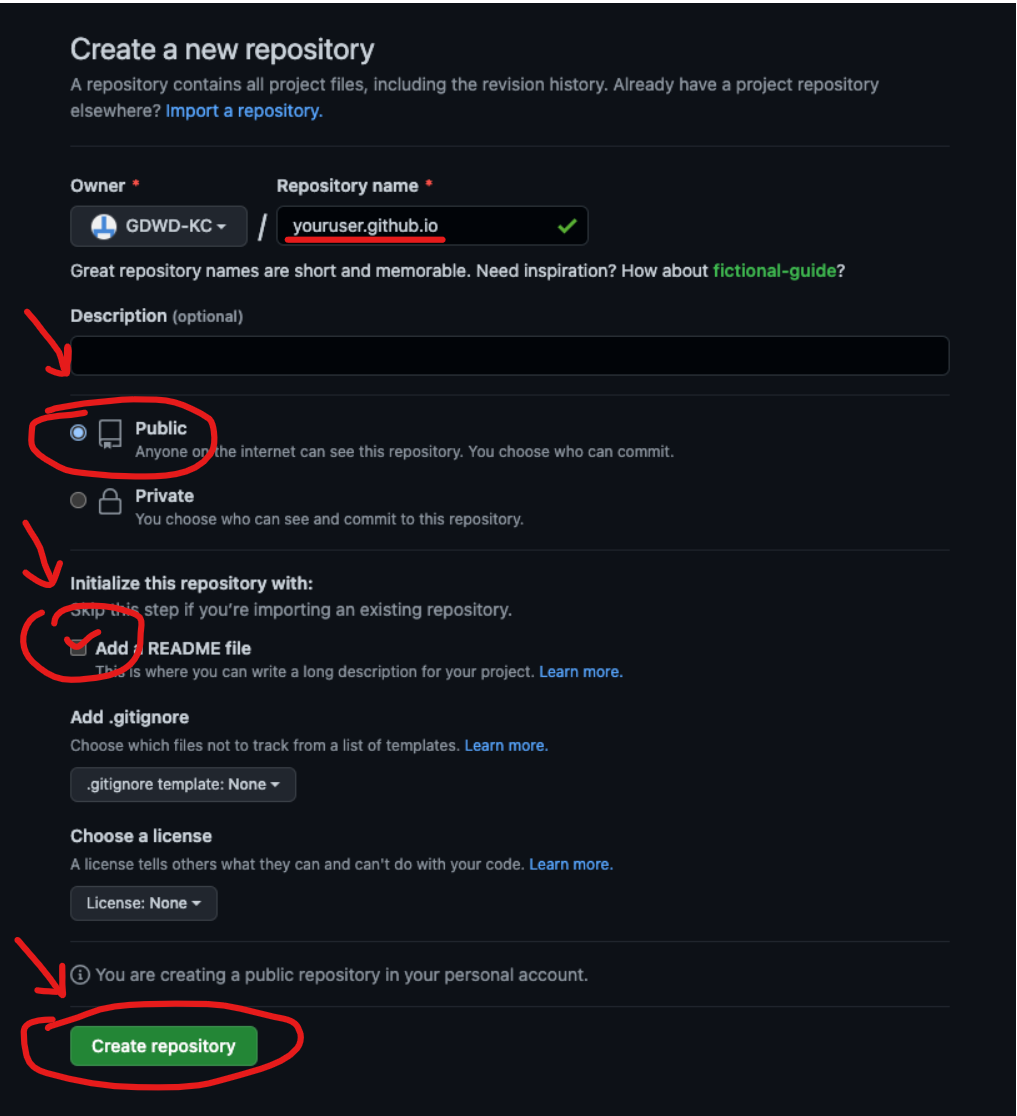
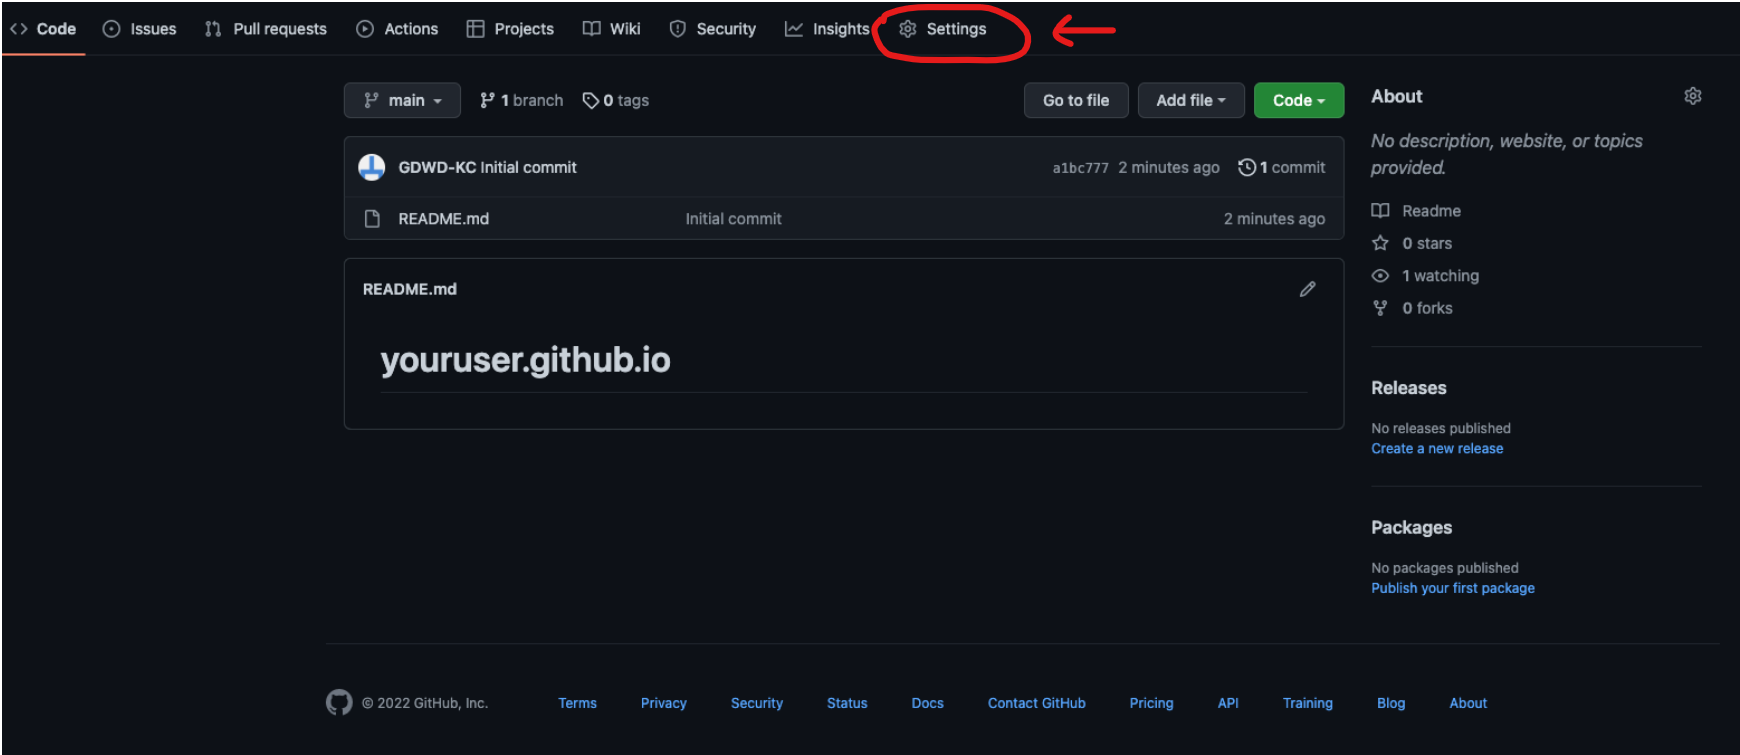
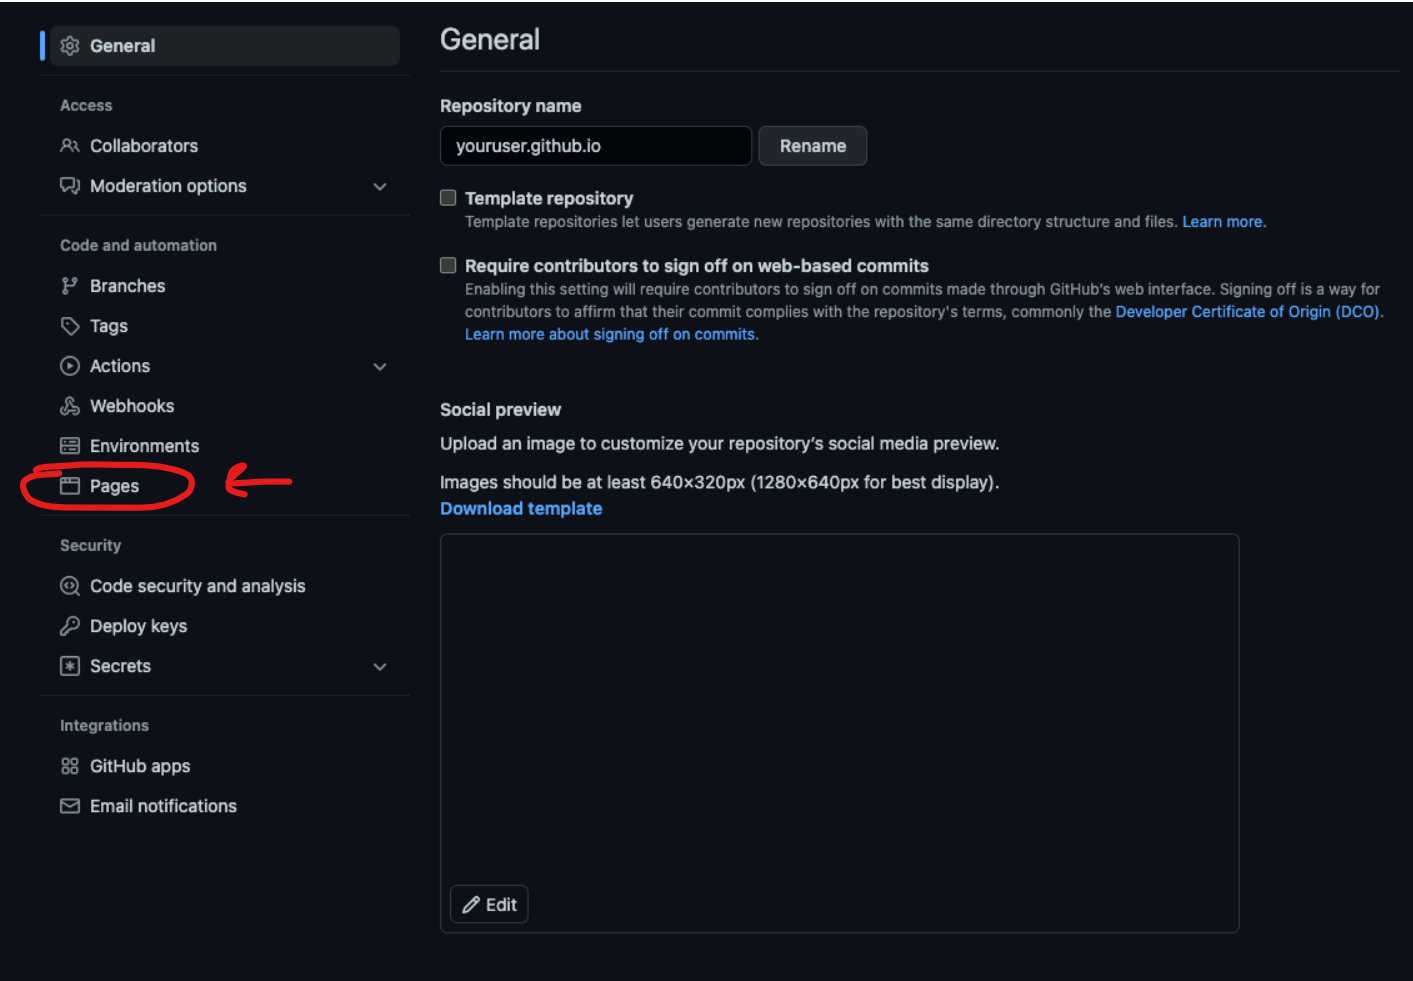
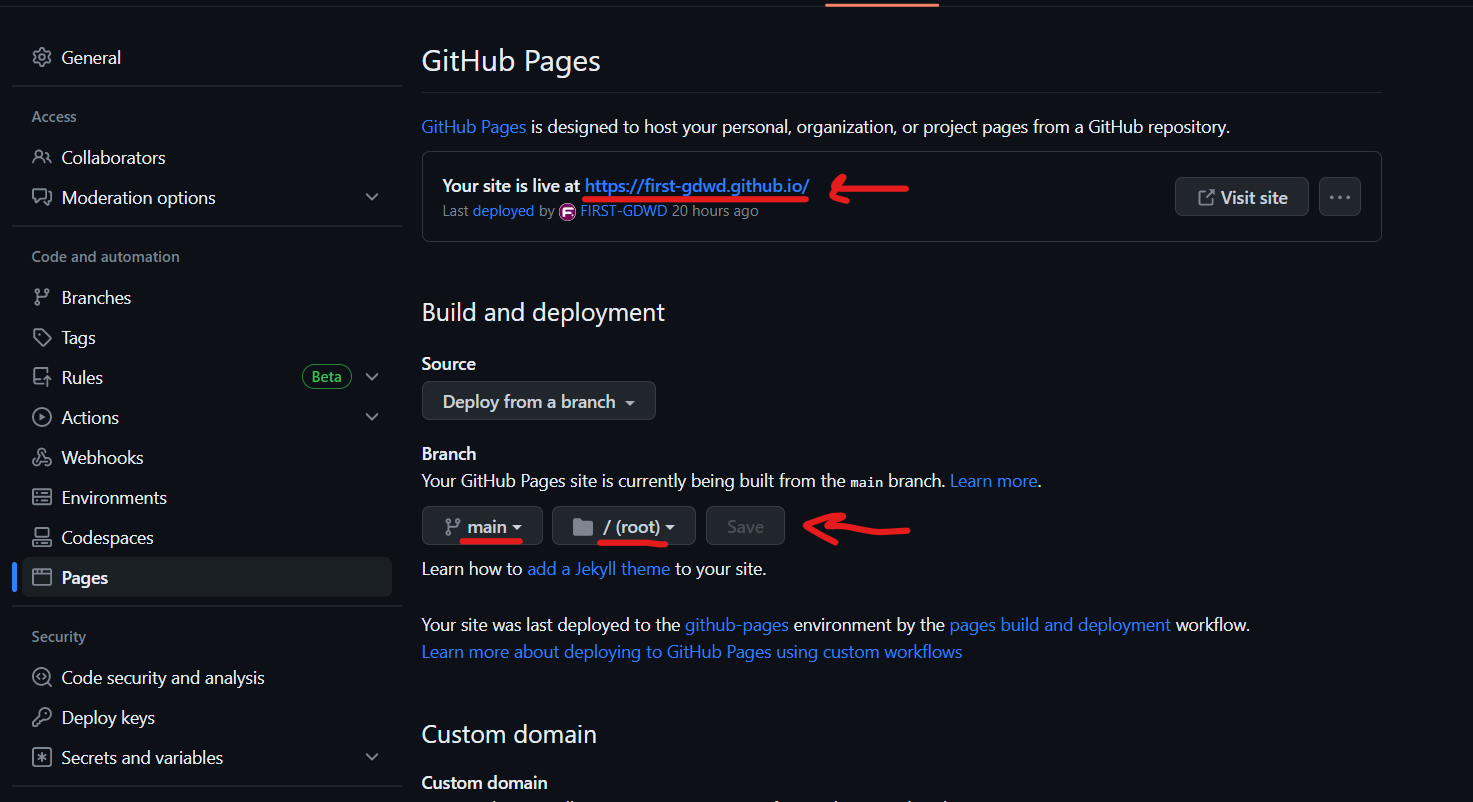
PART 1
Visual Studio Code
Your Code Editor for the Course
-
In order to write code in our class, we are going to download and install a widely used editor called Visual Studio Code Editor.
NOTE: If you are an on-campus student, Visual Studio Code is probably already downloaded, installed, and configured.
If so, just double check that the extensions further down in the directions are installed, and then move on to Part 2.
If not, or if you are an IDL student, continue with Part 1.Visit the following link and click the big blue "Download" button on the following page:
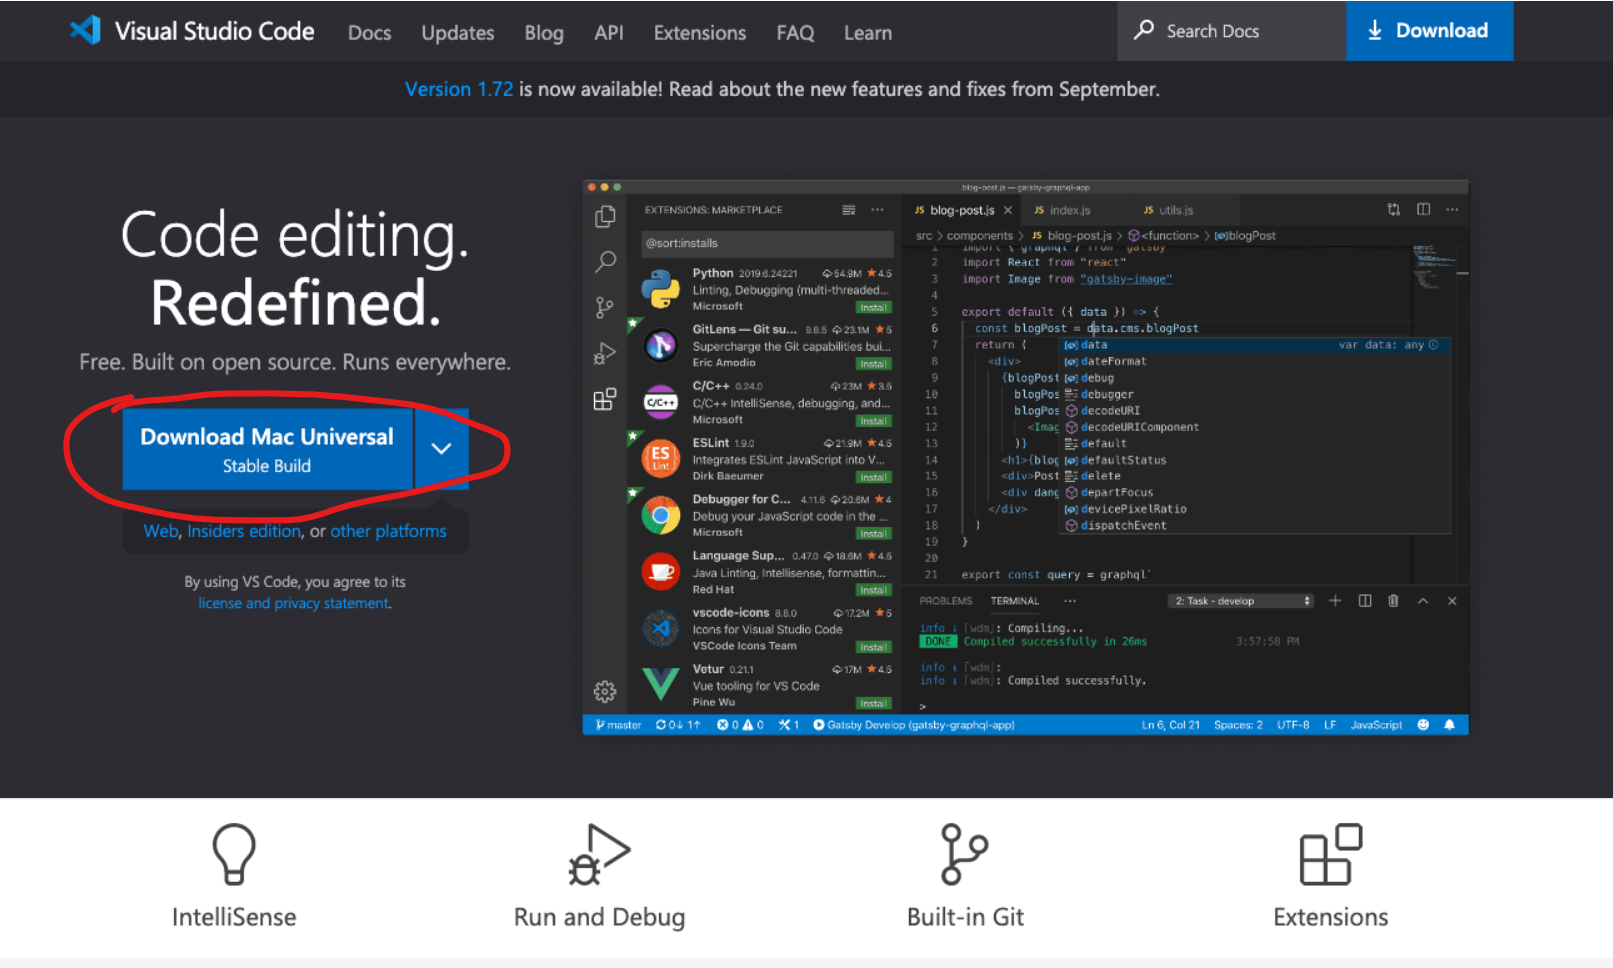
Click the Download button on the Visual Code download site -
If you're on a Mac, once your software downloads, unzip and drag it to your Applications folder.
This will make it easier to find in your Launchpad, and will also set it up properly to interact with the other application we'll be installing later.
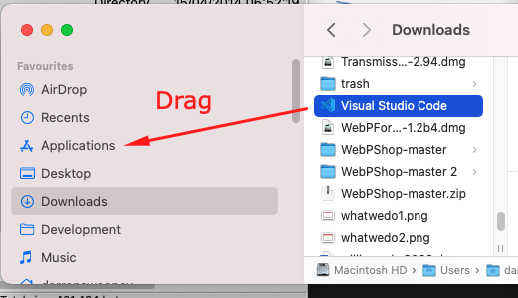
Move Visual Studio Code from Downloads to Applications -
Go ahead and open up Visual Studio Code once you have it installed.
If you are prompted in the installation process to check any boxes before installing, just leave the default settings and continue with the installation.
It should (somewhat) resemble the screenshot on the right.
It may not look EXACTLY the same, and that's okay. Visual Studio Code is always updating itself.
You'll also probably see a Welcome tab and/or some personalization options when you first open Visual Studio Code. You can safely close that tab and skip the Personalization options it has you select.
ALSO, you'll probably see a little popup in the lower right whenever you start up Visual Studio Code, asking you to download and configure Git. You can safely close and ignore that popup.
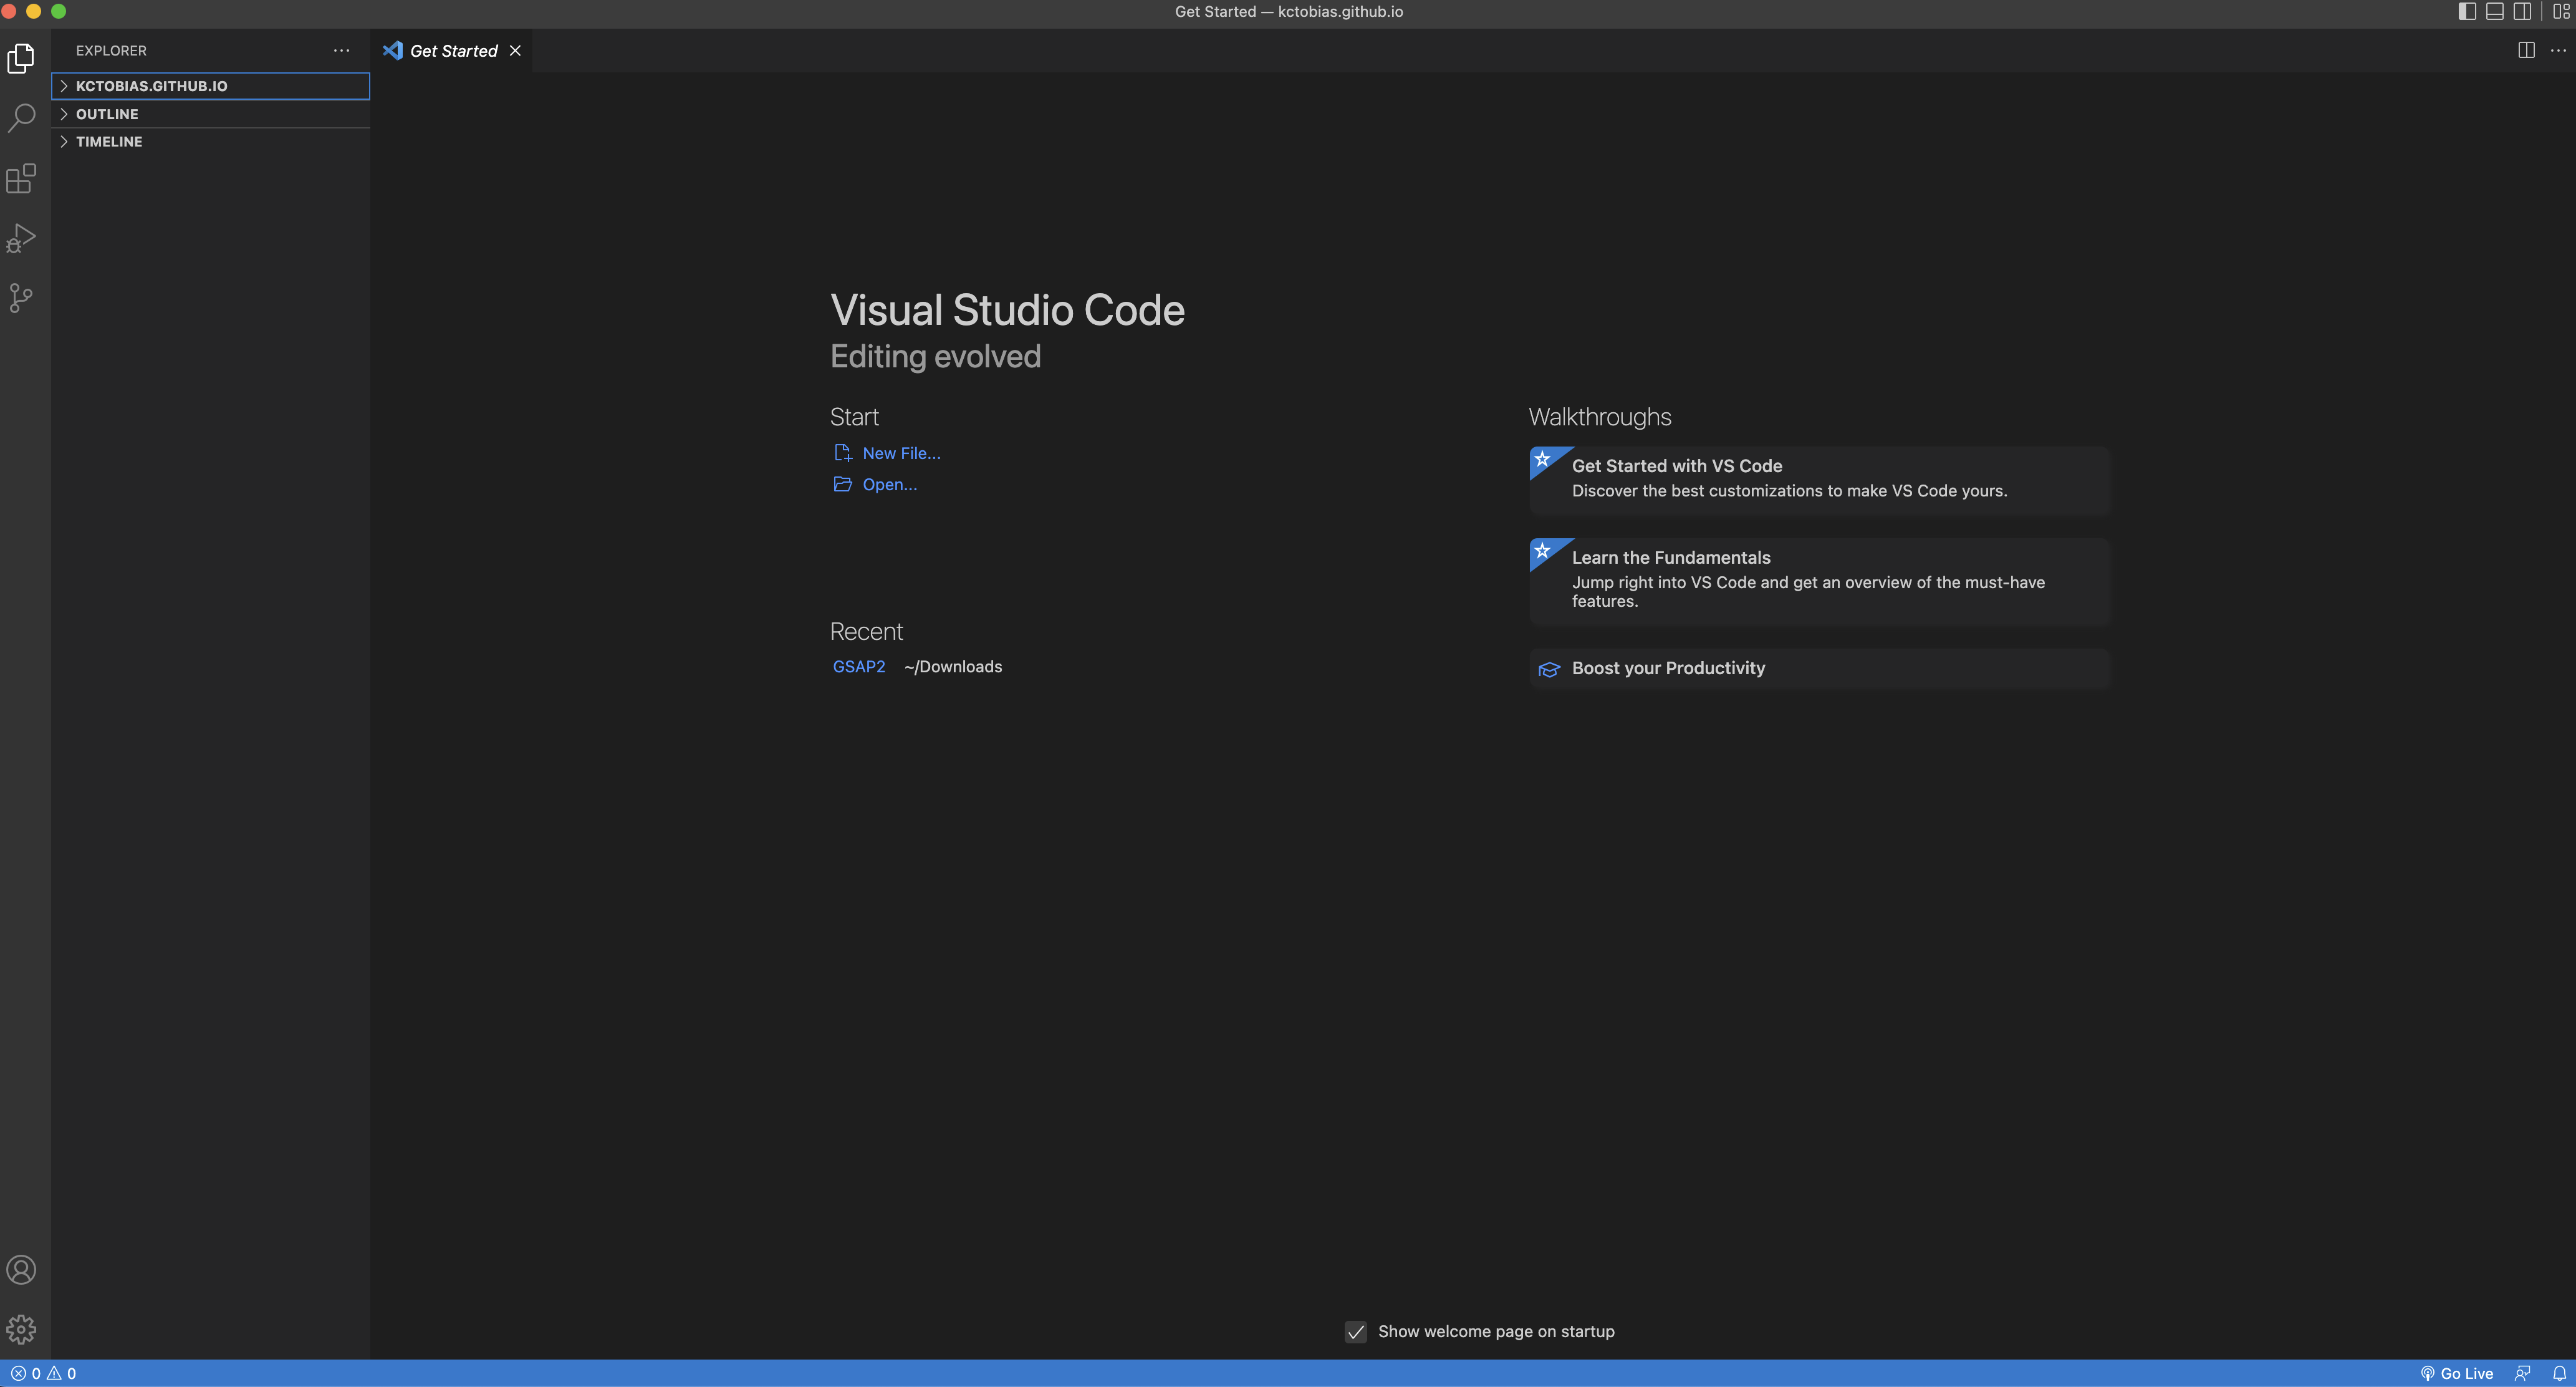
Screenshot of what Visual Studio Code looks like when opened -
Now that we have installed the main code editor we will be utilizing throughout class, now we're going to install an extension that we will need for viewing the live renders of our code.
First, navigate to the left side panel in Visual Studio Code and click the icon with the four boxes.
Then, in the Extensions tab, click in the search bar at the top.
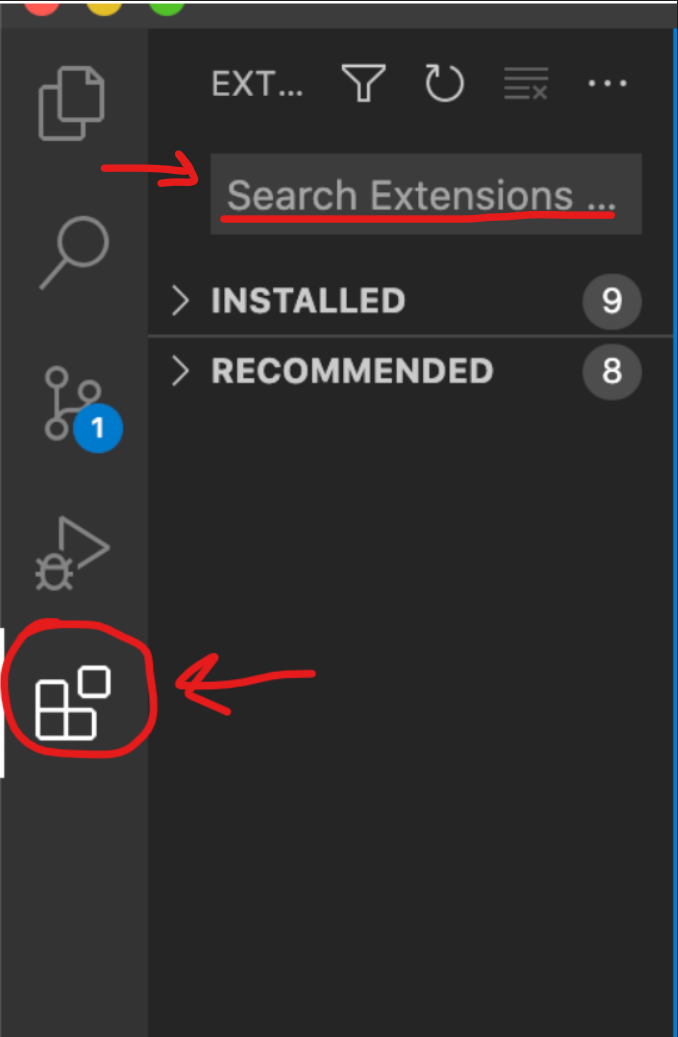
Navigating to the Extensions tab and the search bar inside In the search bar, type "live preview".
The extension "Live Preview" by Microsoft should be one of the first in the list. Click the Install button to install the extension
This extension will allow you to preview your HTML/CSS/Javascript code within Visual Studio AND your browser.
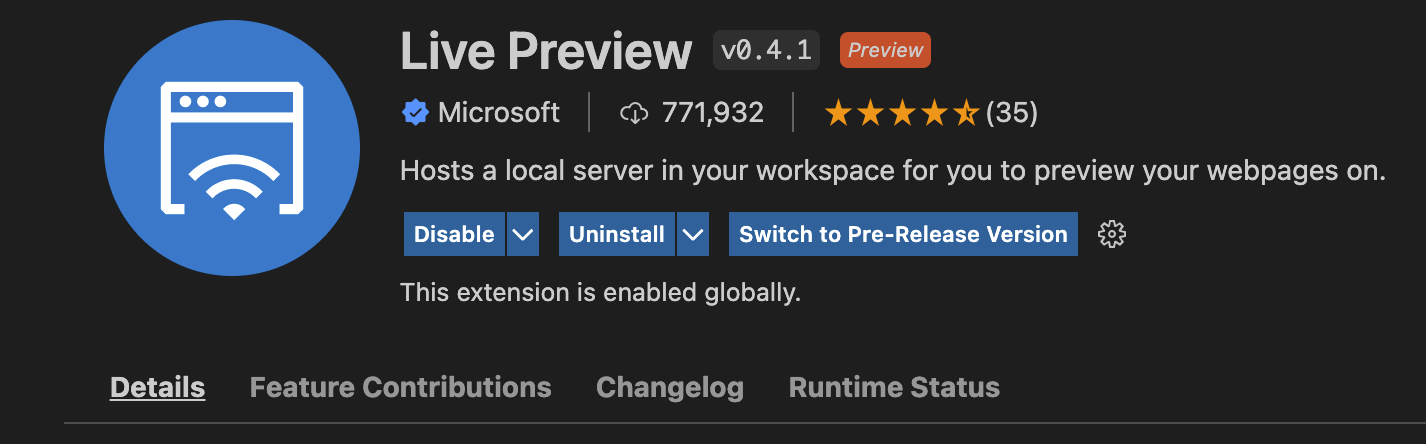
A screenshot of the Live Preview extension -
Next, we're going to configure a few Settings to help you write cleaner code and prevent some common bugs down the line.
Go to the Settings tab. (It's in slightly different places in Mac vs PC.)
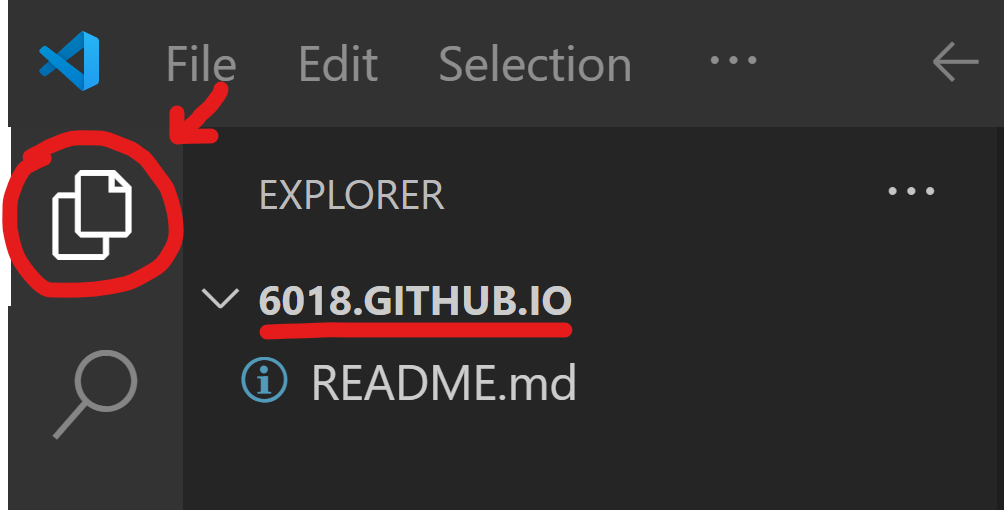
For Mac users, it's under Code -> Preferences -> Settings.
For PC users, it's under File -> Preferences -> Settings.
Once you're in the Settings tab, search for "auto closing tags".
In the setting for "HTML: Auto Closing Tags", uncheck the box beneath it.
That's one setting down.
Next, jump over to another small tutorial that's a bit more complex, so it has its own page.
Adding a Code Ruler
Return here once you have that set up.
Screenshot of the Settings tab, when turning off the "HTML: Auto Closing Tags" setting